
How to Safely Use a Tick Removal Card: A Parent’s Guide
As a parent, we naturally want to encourage our children to explore the great outdoors and we’re here to help you to do that safely. Whether your family love woodland walks, camping, or simply playing in the garden, it’s important to be aware of ticks and how to remove them safely.
According to the NHS 1 in 4 ticks in the UK can carry Lyme disease, so acting quickly and correctly is essential to stop them feeling unwell. One of the easiest and most effective tools for tick removal is a tick removal card.
In this blog post, we’ll guide you step-by-step on how to use a tick removal card properly, ensuring a stress-free experience for both you and your little ones.
What is a Tick Removal Card?
A tick removal card is a small, flat, credit card-sized tool designed with a notch that slides under a tick, allowing for safe and clean removal. These cards are compact, easy to carry, they’re less of a faff than tweezers, making them a great choice for parents on the go.
Ours even comes with a built-in magnifier for better visibility. They slot nicely into your Ouch Pouch giving you an enhanced first aid kit for children.
Why It’s Important to Remove Ticks Properly
When ticks are removed improperly—by squeezing, crushing, or pulling too hard—their mouthparts can remain embedded in the skin, increasing the risk of infection or transmission of diseases. It’s also possible that squeezing the tick can cause it to release harmful bacteria into the bloodstream.
The tick removal card helps avoid this by ensuring that the tick is removed in a controlled and safe manner.
Steps for Using a Tick Removal Card
Step 1: Stay Calm If you find a tick on your child, it’s natural to feel alarmed, but staying calm is essential. Ticks are slow feeders, and immediate removal reduces the risk of disease transmission, but there’s no need to panic.
Step 2: Gather Your Supplies Grab your tick removal card and your Ouch Pouch. Having everything on hand will make it all so much easier.
Step 3: Position the Card
- Locate the notch on the tick removal card.
- Place the notch as close to your child’s skin as possible, ensuring it slips under the tick’s body where it’s attached.
- Resist the temptation to grab or pinch the tick’s body with your fingers.
Step 4: Slide the Card
- Gently slide the card forward so that the tick gets caught in the notch.
- As you slide, the card will lift the tick out of the skin in one smooth motion. Avoid jerking or twisting, as this can leave parts of the tick behind.
Step 5: Check the Site Once the tick is removed have a good look at the area. If any parts of the tick remain embedded in the skin, don’t panic; they will often work their way out naturally.
Step 6: Dispose of the Tick Place the tick in a sealed bag or container and dispose of it.
Step 7: Clean the Area Grab a wound cleansing wipe from your Ouch Pouch to disifect the bite area. This helps reduce the risk of infection. You should also clean the tick removal card after use.
Step 8: Monitor Your Child After removing the tick, keep an eye on the bite for the next few days. Look for signs of infection like redness, swelling, or a rash. If you notice flu-like symptoms, fatigue, or a bullseye-shaped rash, contact your GP or call 111 for some reassurance.
Why a Tick Removal Card is a Must-Have for Parents
- Portable: It easily fits in your purse/wallet or Ouch Pouch, so you’re always prepared.
- Simple to Use: Unlike tweezers, which require a steady hand, precision and a compliant patient the card’s notch design makes tick removal straightforward and stress free!
- Gentle: The card minimizes the risk of squeezing the tick’s body, which can transmit diseases.
Tips to Preventing Tick Bites/ Spotting them Quickly
- Have a tick remover card with you! This way you can spot it and remove safely (and also give you massive reassurance to know that you have got the tools if required).
- Where possible, stick to paths when walking (easier said then done with a runaway toddler!)
- Stop during your outing for regular “tick checks” where you actively look for any ticks on the clothes and skin
- Opt for long sleeves and long trousers
- Wearing lighter colours will make spotting ticks much easier (again, maybe easier said than done if you have a little fashionista on your hands)
- Make sure you check crevices carefully… ticks like to burrow!
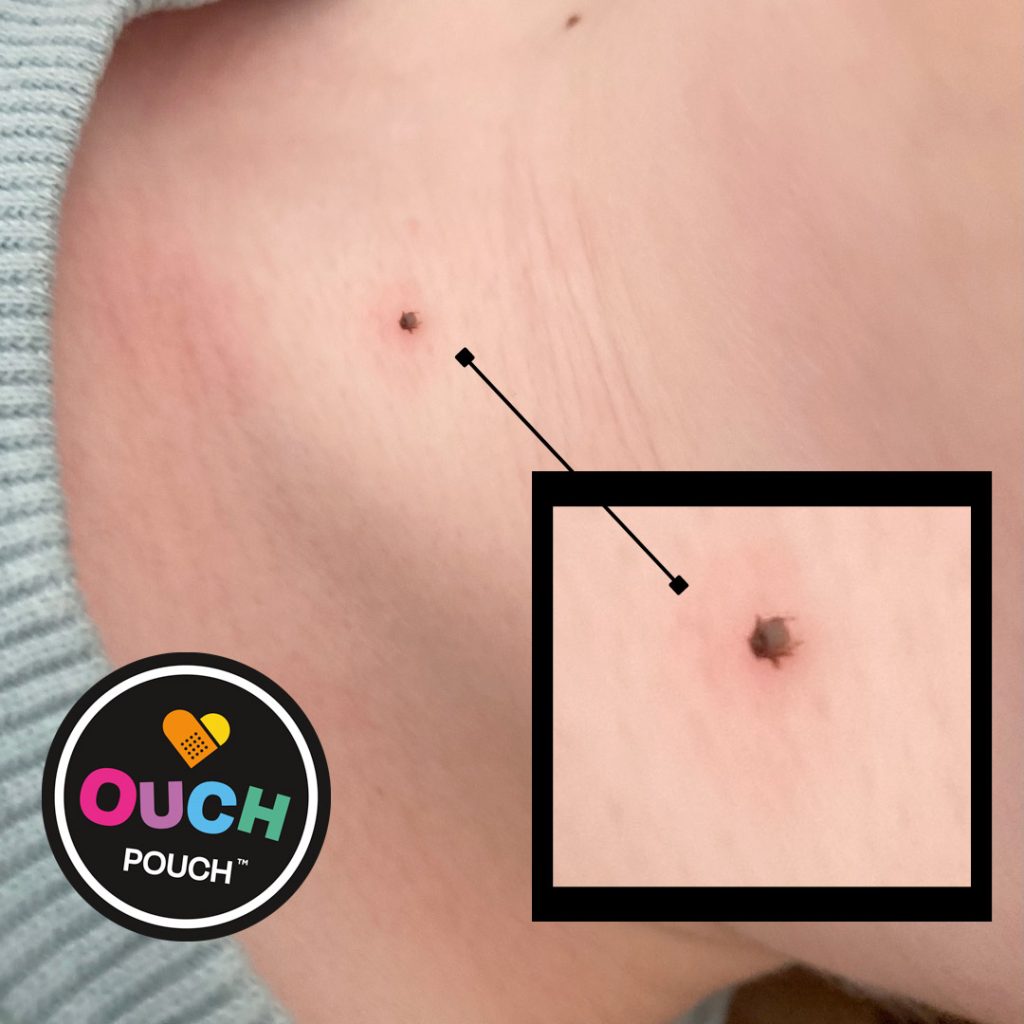
If you unsure about a spot/ mark, try taking a photo and zooming in. This might show the tick more clearly (or prove that it is in fact a freckle after all!)Each Ouch Pouch comes with a handy quick reference guide tucked inside which is ideal great to check if you’re feeling a little flustered.Did you know….Our co-founder Sammy teaches first aid in a fun and friendly way. Learn children’s first aid online, or face to face with Sammy over at Happy Hearts First Aid. Vouchers for baby first aid, toddler first aid, or her get confident with choking course pair really well with an Ouch Pouch for new parents and are great corporate maternity gifts!